Motivation, Goals, and Development
At the end of our Embedded Systems (CS 435) class, we were asked to complete an embedded system as a project. We were expected to come up with an idea, figure out what parts we needed within a budget, plan out a circuit, wire/solder all the components together, and write a program to run our system. We had some oversight from our professor, in case we were really stuck, but it was an almost entirely unsupervised project within our small groups. Our inspiration for the project was the water bottle fillers located around the school. We thought it would be interesting to create our own version and better understand the device as a result. We also wanted to use the experience we gained in our labs with devices, libraries, and wiring to create our circuit and code and refine it to reach a complete, usable version of a water bottle filler. We also wanted to make it usable in a few different ways after having a few class dicussions about usability and accessibility. We referred to the AdaFruit reference pages for the peripherals we purchased and their respective libraries on the Arduino website during development.
Devices, Peripherals, and Code
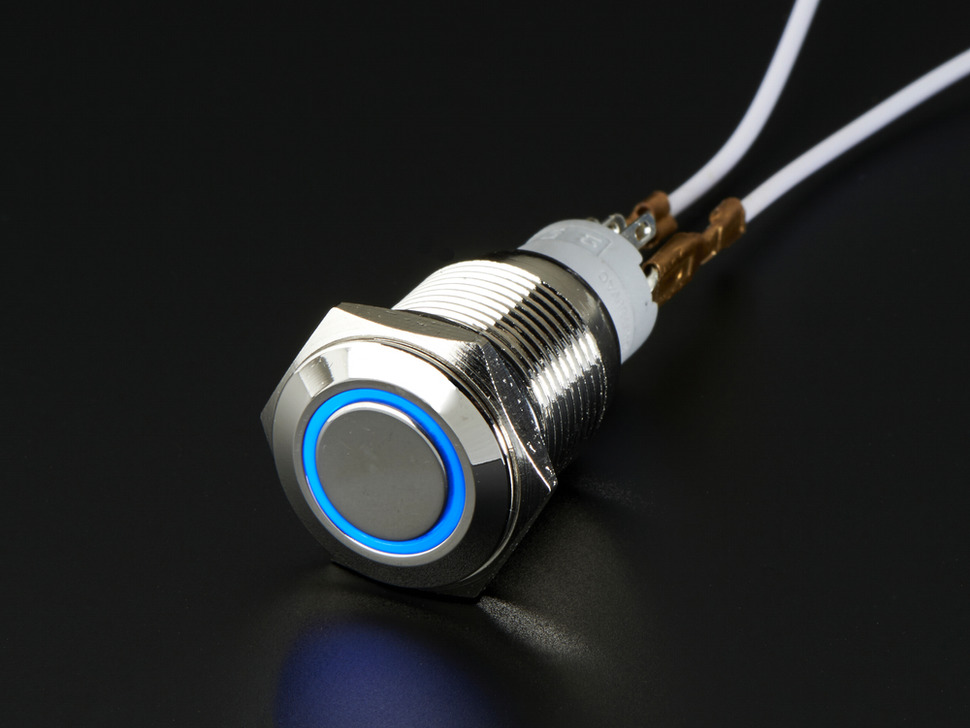
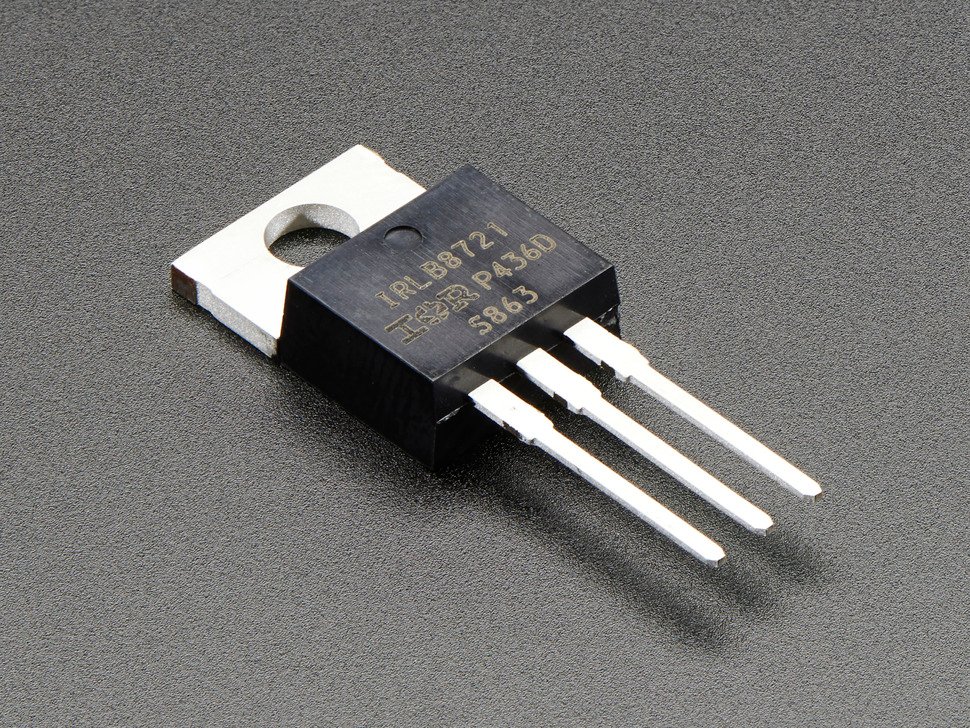
We used the Adafruit HUZZAH32 - ESP32 Feather as our microcontroller for the circuit. It has a lot of GPIO pins, which we needed for all the peripherals we were going to use, and it also can use the Arduino libraries, which we needed to interact with those peripherals. It was also a device that we already had purchased for the class, so it was convenient. We chose our peripherals for many reasons. Choosing most of our peripherals from AdaFruit meant that we could use their immensely helpful guides and their libraries. We needed to make sure we could power our parts, so we chose parts that could run on 5V. Unfortunately, the solenoid valve that we found needed 12V to run, so we had to get an external power supply. Luckily, we found a 12V/5V power supply that enabled us to power both the whole circuit and the solenoid valve with only one connection to the wall. We also considered the ways in which a user could interact with our system. The system that already exists around the school has a proximity sensor for the bottle filling, but no button. We wanted to have at least two ways of using our system, so we implemented a button as well. The user is shown how many plastic water bottles haven't been used as a result of our system on an LCD. Budget also had an impact on our choices, as we had to be under a $150 budget for the whole project. We only spent about $70 of that budget. For reference, the item we had as inspiration costs about $1500. The peripherals we used are shown below with links:
This is the code for the open and close functions. The opener function gets the time when it is called and puts in it the global variable reserved for the start time. It also opens the solenoid valve by sending a high value to the MOSFET, which manages the 12V reserved for the solenoid valve. The closer function gets the time as well, but stores it in the variable reserved for the current(or stop) time. It then calculates how long the valve was open by determining the difference between the two times, and does some math to calculate how many ounces of water and, using that, how many bottles of water it saved. It sets the cursor on the LCD to the second line and prints the amount of bottles saved to that line. It also stores the value of bottles saved to the memory. Finally, it closes the valve.
This is the loop function, the heart of an Arduino program. This runs indefinitely, or until the device gets disconnected from power. The logic behind it appears complicated, but once you get into it, it's very straightforward. The first check we do is to have the led on the button reflect its status. If the button is pressed, we turn the light on, and if its not, we turn it off. The next line is getting the proximity value from the proximity sensor and storing it in a variable. Then, if the button is pressed and the valve is closed, we call the opener function, because we want to open the valve. Otherwise, the button is not pressed, so we want to use the proximity sensor data to control the valve. In this case, if the object near the proximity sensor is closer to the sensor than the range we have defined and the valve is closed, we call the opener function to open the valve. Otherwise, if the proximity value is outside the range that we have defined and the gate is open, we call the closer function to close the valve. We continue in this loop forever, calling the valve to open and close based on the sensor and the button.
These are the libraries we used. We used the Wire.h library to control the digital GPIO pins, which meant we didn't have to use ports or pins or binary numbers, all things we had to do in labs to fully understand what the digital writes and read did. We used the Adafruit_VCNL4010.h to control the proximity sensor. This gave us the ability to read the values from the sensor and to use them in our circuit. In fact, our program is just the example program for this header file expanded to fit our needs. It contained the ability to read the ambient light level as well, but we didn't need that. We used the Adafruit_LiquidCrystal.h library to control the LCD. We had a lot of trouble with this, as the original library we were using wasn't working. We went through a lot of back and forth, even asking our professor for help, and eventually realized that one of our wires was dead, but that we were also using the wrong library. We switched to this one and replaced the wire, and it worked. We used the EEPROM.h library to get the value of water bottles stored to save on the device even when the power was disconnected. This allows us to move the device and not lose that information.
Item | Supplier | Price |
---|---|---|
VCNL4010 Proximity/Light Sensor | AdaFruit | $7.50 |
Standard LCD 16x2 | AdaFruit | $10.95 |
Plastic Solenoid Valve | AdaFruit | $6.95 |
Metal On/Off Switch with LED | AdaFruit | $4.95 |
N-Channel Power MOSFET | AdaFruit | $1.75 |
Kickback Diode | AdaFruit | $1.50 |
Power Supply Kit (12V/5V) | Sparkfun | $17.95 |
Full Sized Breadboard | AdaFruit | $5.95 |
This is our bill of materials. We had a budget of $150, and spent just about $70.
The Final Product
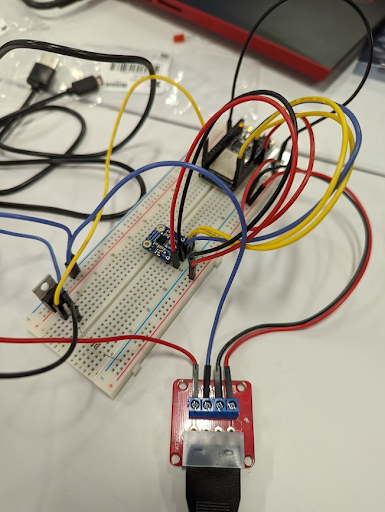
This is the circuit we created. On the left is the on/off button. The black and silver part on the white breadboard is the feather, our microcontroller. That is what controls the entire system. The blue and green rectangle attached to the lower side of the breadboard is the LCD, the screen that has information printed to it by the feather. The blue square just above the middle of the LCD is the proximity sensor. Just to the right of the LCD is the MOSFET, which controls the 12V provided by the power supply. The blue dial between the proximity sensor and the feather is the contrast dial for the LCD. The white object at the top of the image is the solenoid valve, and the black wire connected to the red square in the top right is the power supply, which is running 5V and 12V to the breadboard.
This is a video demo of our project. It shows the button being clicked, opening the valve. You can hear the valve opening and closing. The button is released, making a louder noise when it closes the valve. You can see that the LED on the button turns on when the button is pressed and turns off again when it is released. Then, a hand is waved over the solenoid valve while the button is still pressed. Notice that it does not close or open the valve, as the button is pressed already. Because we give precedence to the button, the hand has no effect. Then the button is released, and the hand waves again. Notice that this time, the valve opens and closes based on the proximity of the hand.
Accessibility and Environmental Implications
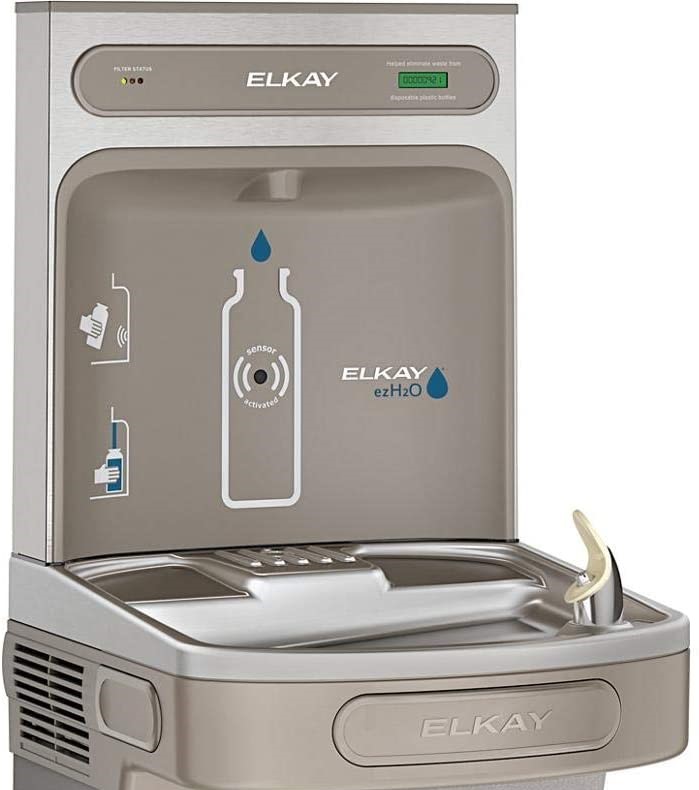
This is the bottle filler / water fountain that is available around campus. It has a drinking part, which ours does not have, but this could impede people in wheelchairs from being able to get their water bottle under the sensor area of the filler. It also does not have a button with which to turn on the bottle filler, in case you needed to connect something like a hose to fill up a much larger container that could not get close enough to set off the sensor and still be under the tap. This also costs $1500, whereas ours cost about $70 when purchasing not in bulk. Although our project does not have a water fountain part to it, we felt like that did not have a significant impact on the environment or plastic water bottle usage. Ours is also more accessible.
Our water bottle filler saves the environment by encouraging users to use reusable water bottles. It makes using these bottles easier, as filling them up in a sink is often impossible and filling them up in a water fountain can be tedious. Showing the users how many of the water bottles have been saved by using our system also has a positive effect, as it encourages them to keep using it to get the "score" higher. Not only is the single use of a plastic water bottle wasteful in and of itself, the transportation and creation impact is bad for the environment.
Intended vs. Actual
This was our intended schedule. We wanted to have the valve working by 11/15, the on/off switch and the sensor working by 11/22, have it connected to a water source by 11/29, and have the screen implemented by 12/6. However, it didn't turn out exactly like this. We didn't have the parts until 11/29, and they weren't soldered(connected to pins) until 11/30. On that day, we had a 3 hour lab, and we assembled the power supply, connected the solenoid valve, connected the proximity sensor, and coded a program to control the solenoid valve with the proximity sensor after implementing all the required libraries. Then, on 12/3, we got the button working, and the LCD working on 12/8.
Things We Struggled With
We struggled with a few things on this project. First, we struggled with the design, as we needed 12V to run the solenoid valve and 5V for the feather and everything else. This was a problem until we found the 12V/5V power supply, which allowed us to split one wall connection into different voltages. This allowed us to power all the components at the same time, providing the correct amount of power to each. We also struggled with the LCD screen. We couldn't get it to work for days, trying many different libraries, rewiring the whole system, running just an LCD control program, and using different components. We tested all the different parts, and they all seemed to work. Our professor helped us by using a connection tester so we could test all the wires individually, and that showed us that one of them was not conducting any signal. After replacing that wire, we were able to print to the screen as we expected to. This definitely affected our timeline, but did not change our goals, as we were finally able to fix the issue.
How We Would Expand Our Project
If we were to continue working on this project, we could put it in a container to make the solenoid valve and proximity sensor easier to use. We intended to do this the last week of classes or during finals week, but we were thwarted by getting sent home due to COVID-19. Another thing we could do would be to connect to a water source that doesn’t need to be refilled, allowing it to function in the same way as the water bottle fillers around the school function. We could scale the size of the solenoid valve as well, in order to use it with a larger diameter pipe if we so chose.
How We Completed Our Project
GitHub Project Link
https://learn.adafruit.com/using-vcnl4010-proximity-sensor/
https://cdn-shop.adafruit.com/datasheets/vcnl4000.pdf
https://cdn-shop.adafruit.com/datasheets/vcnl4000AN.pdf
https://www.vishay.com/optical-sensors/list/product-83462/tab/documents/
https://www.arduino.cc/reference/en/libraries/adafruit-liquidcrystal/
https://github.com/adafruit/Adafruit_VCNL4010
https://www.arduino.cc/en/reference/wire
https://learn.adafruit.com/adafruit-huzzah32-esp32-feather